I find the process of collecting and saving my own seeds increasingly rewarding. In fact it’s one of the core guiding principles of my wild way approach: to save and grow as many plants as possible from collected seed. Especially important to me in our new garden in West Yorkshire. I love the plant lifecycle so much I ended up designing recycled seed packets to the exact specs I wanted (you can buy them in two sizes in my shop).
Why collect and save your own seeds?
I enjoy collecting seeds because it’s fun, it’s free and it allows me to feel a stronger bond with my garden. Masses of plants can quickly be grown from seed to fill an entire plot for the cost of some compost and time.
Collecting and storing seeds is something we’ve all become so detached from it can seem like black magic at first, we’ve become so used to buying seeds in colourful packets from shops. Yet it’s actually one of the easiest things to do, if you break away from that witchcraft mindset.
By growing, collecting and using your own seeds, you’re also doing a little bit for the planet by cutting out an extra source of carbon use from transportation.
Tailored plants to your garden’s unique conditions
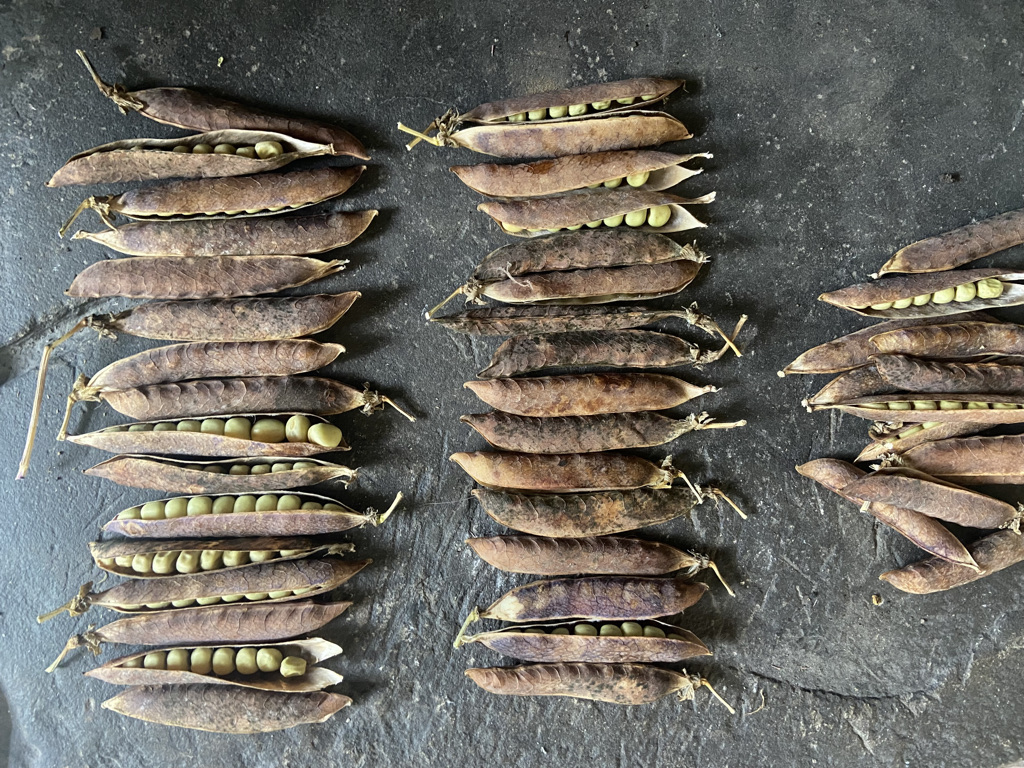
I first grew Pea ‘Blackdown Blue’ on my London allotment in 2020 and saved the seeds to grow on my Yorkshire allotment in 2021. Last year I only selected pods from strong plants with most pods containing 8 or 9 peas, and this year’s crop has more pods with that number. In 2022 I will only grow from the 9 peas per pod row.
One of the big benefits of collecting your own seeds is that you can grow stronger plants. Through the process of selection you can, over the years, encourage plant traits you prefer.
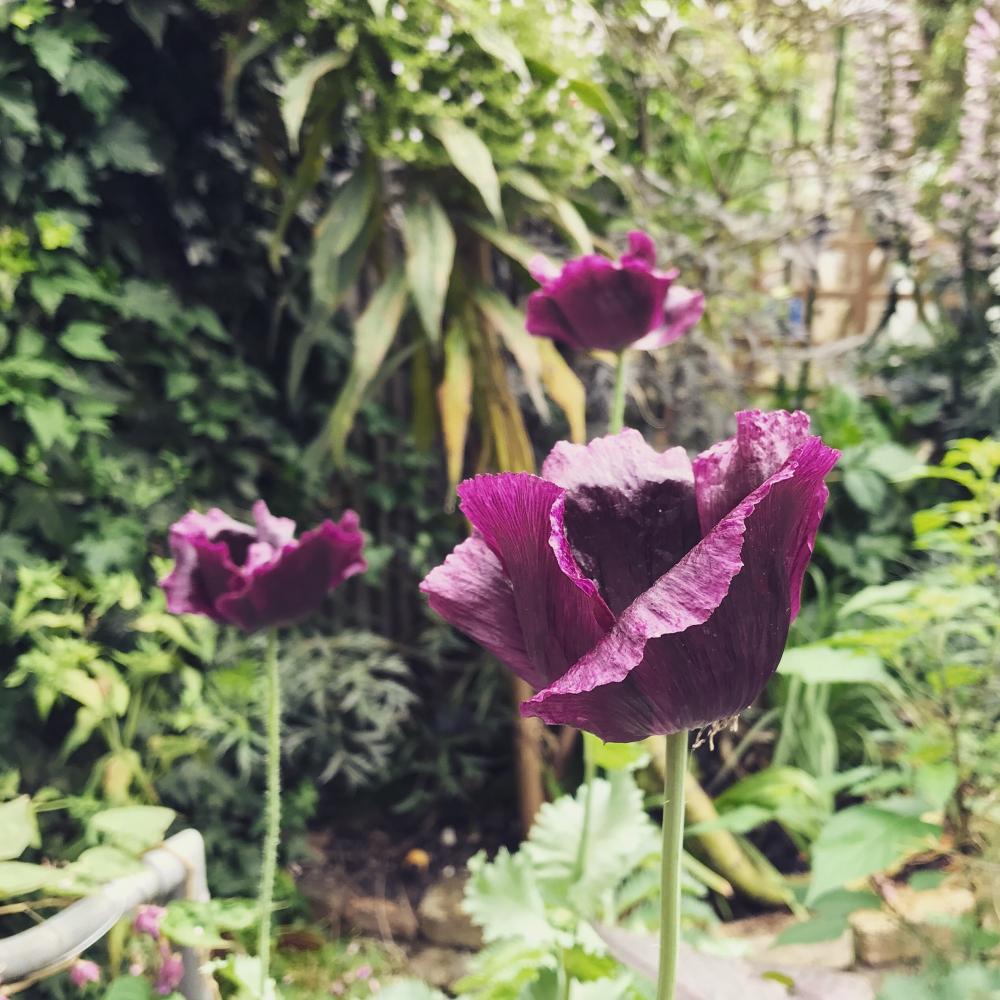
For instance, if a poppy is a particular colour you like or a pea plant has more peas per pod, save the seeds from those plants to steer future generations down that path. If one plant seems more resistant to pests or disease, such as mildew, focus on collecting seeds from that plant.
Plants will adapt to your garden’s conditions too. By taking seeds from the strongest plants, you’re selecting those happiest in your specific conditions.
Cross pollination
For the best results, it’s best to grow plants you like in isolation to reduce the chances of cross pollination. If you grow two different colour calendula marigolds next to each other, insects will take pollen from one to the other and their seedlings will show traits from both parents. To prevent this, grow just one type of calendula.
This principle is true for every plant and is particularly important for vegetables if you want to grow the same type next year. Some vegetables, such as the cucurbit family (courgettes, pumpkins, squash and cucumbers) can actually revert to a poisonous form, so particular care is needed with that family of plants.
Sometimes though, cross pollination can be a good thing and this is how all plant breeding is done. Selecting two parent plants you like and cross pollinating them to see if their seedlings grow into a plant with the traits you wanted. This can be a bit hit and miss, and professional plant breeders will go to great lengths to control pollination by growing plants indoors away from insects, pollinating by hand.
Which seeds shouldn’t you collect?
Cultivars are plants that have been bred by people to produce a particular consistent flower, fruit or vegetable.
Some cultivars will grow like their parents as long as they don’t cross-pollinate with a different cultivar. E.g. different coloured poppies. In some cases, particularly flowers, this can actually be fun, but for vegetables where you want more guaranteed results, you’ll probably want to try and isolate plants for this reason.
I do this by either 1) growing only one plant of a type, or 2) only allowing one cultivar of that type to flower. For example, this year I grew five different cultivars of lettuce but only left one cultivar row in the ground to flowers. The others were removed to prevent cross pollination, meaning the lettuce I’ve saved seeds from will come true to the parent.
At this point let me throw in the curveball that you cannot save seeds from F1 varieties and expect them to grow like the parent plant. ‘F1’ is industry jargon for a cultivar that is the result of a careful breeding programme ending in hybrdisation between two different cultivars. Often the programme and cultivars are secret and this means it’s not possible for us at home to replicate the conditions.
Instead, for plants I want to save seeds from, I look for the term ‘open pollinated’ because these have been grown in the way I describe and can be replicated at home. They are pollinated in the open by insects and generally grow like their parents as expected as long as they aren’t cross-pollinated with a different cultivar of the same plant.
It goes without saying, that two different types of plant species cannot cross-pollinate. A carrot and a cucumber cannot produce a cucacarrot. But an orange and a purple carrot can cross-pollinate to produce… who knows what.
When to collect seeds

The main rule with collecting seed is to catch it at the point just before the plant will naturally drop the seeds. This happens after flowering and is almost always when the flower has turned into a seed pod or seed head and starts to go brown and dry. Seeds are then ready when the dried seeds come away freely by tapping or pinching gently, you shouldn’t have to pull them off.
For many plants, it’s quite obvious when the seed is ready. For instance pea pods will turn brown and start to split, as many podded plants do. Such as most in the pea family (Fabaceae) like sweet pea, and on cabbage family plants (Brassicaceae), e.g. mustard plants, kale, radish and wall flowers, Erysimum spp. Poppies have their obvious capsules which open at the top, spilling seed out in the wind.
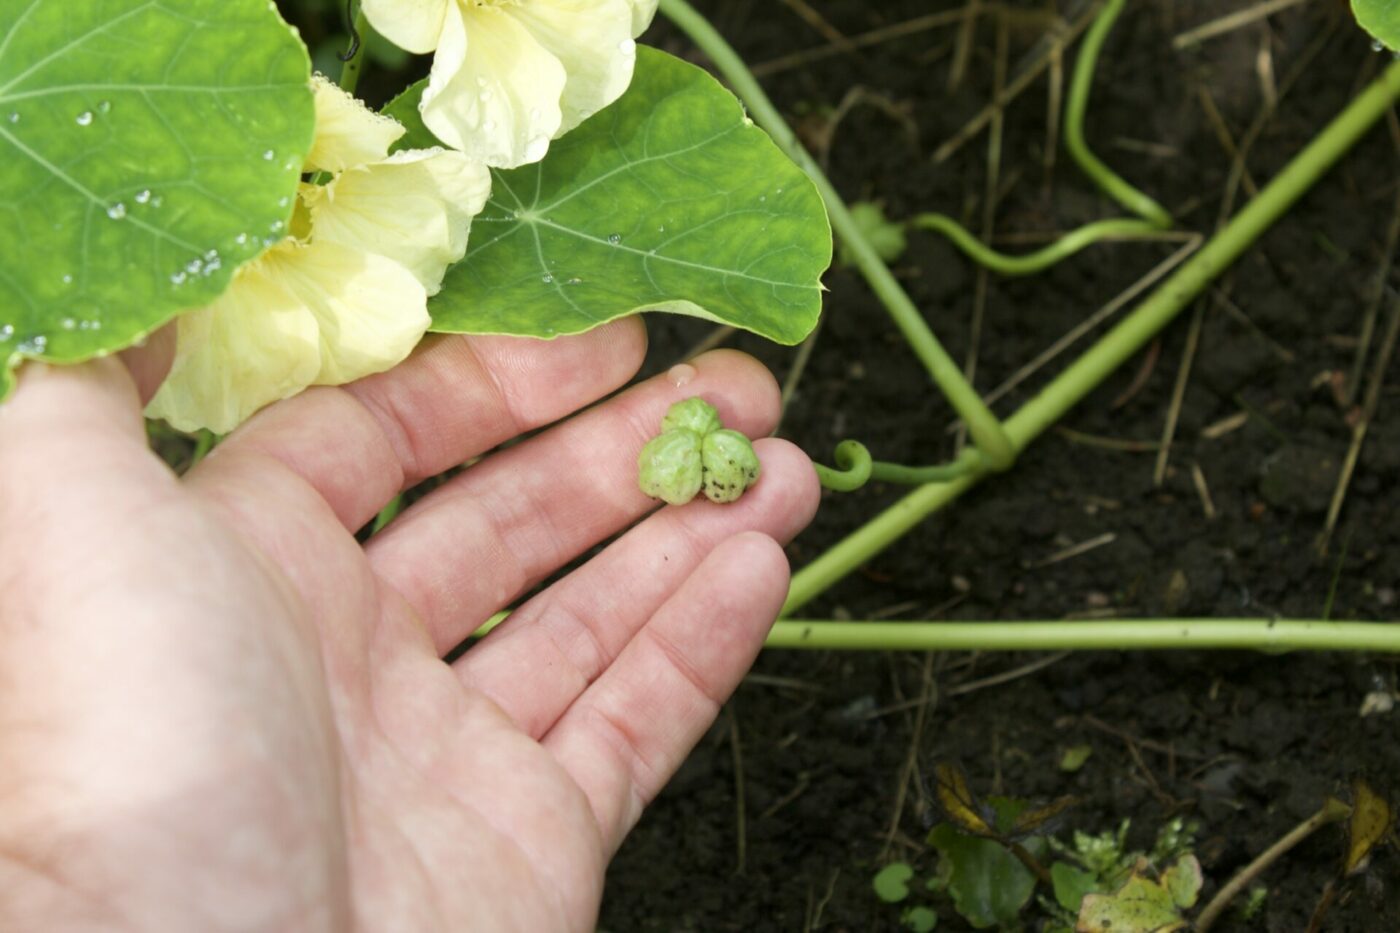
For other plants, the seeds are held in the open air, such as with nasturtium (Tropaeolum spp.) and cow parsley below.

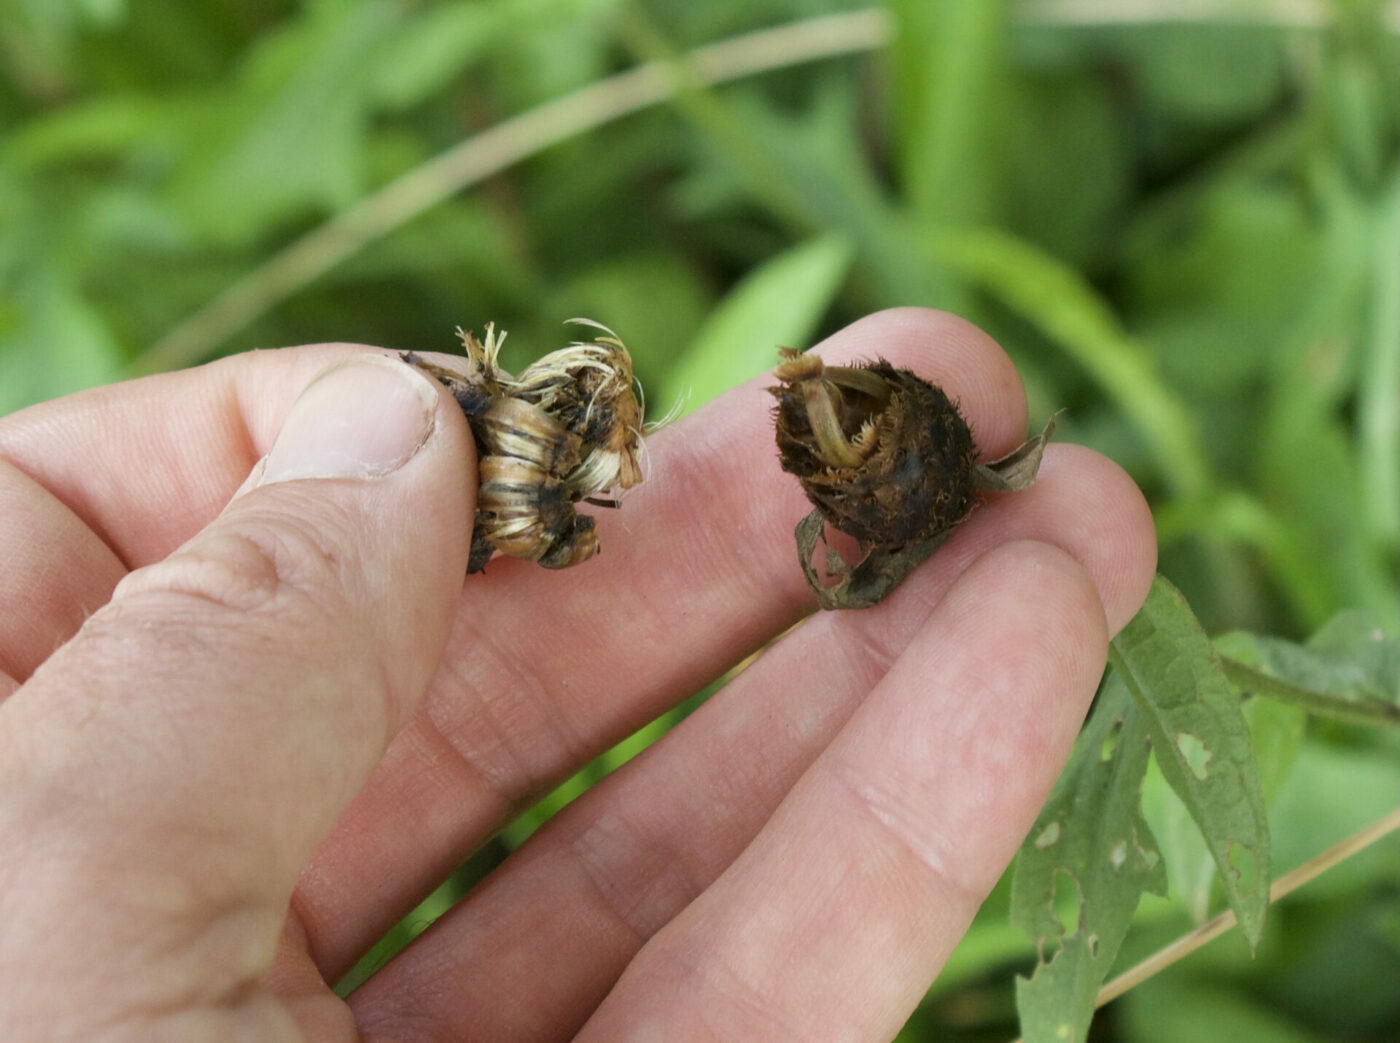
The daisy family (Asteraceae) includes plants like Echinacea, Rudbeckia, Ox-Eye daisies and thistles, such as knapweed, Centaurea nigra below. All of these plants consist of hundreds of tiny flowers producing a mass of seeds either in the middle part of the flower, in daisies, or on the top, for thistles. When these are ready they will crumble away with the brush of a thumb and can be pinched to pick up. If they don’t come away easily, they aren’t ready.
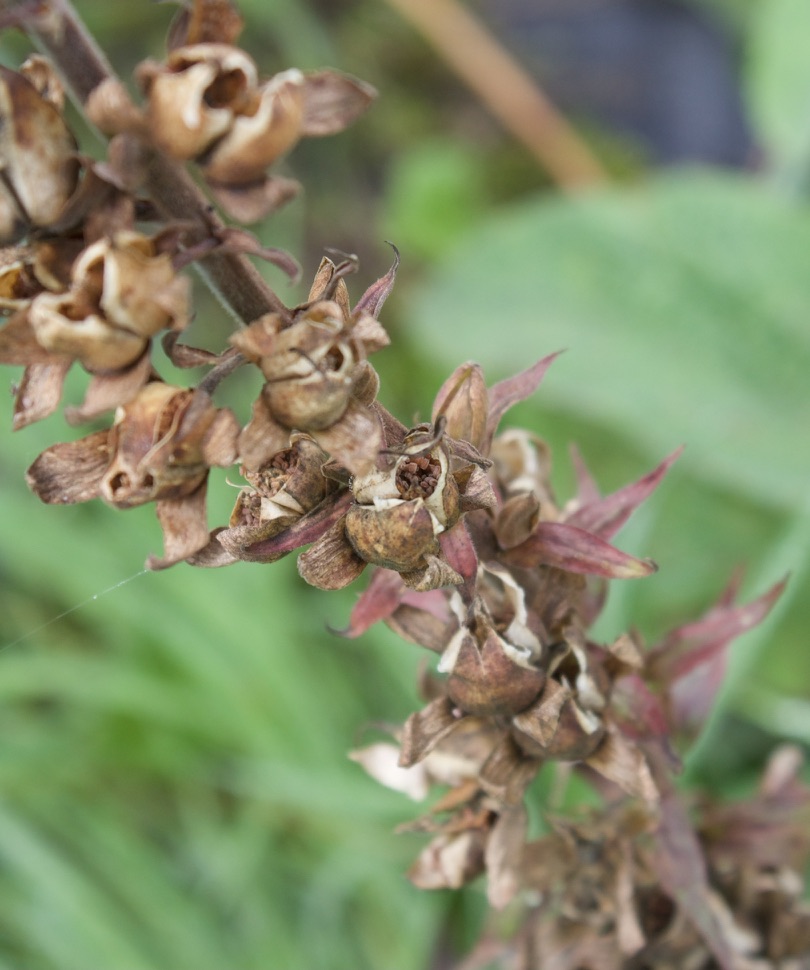
Many plants produce capsules that split open spilling out seeds, like this foxglove, Digitalis purpurea, below.
How to collect seeds


Once you know the seeds are ready, it’s a simple case of transferring the seeds into a packet, and dropping as few as possible! It’s best to do this on a dry day because seeds need to be stored dry, and I find in the wet they can get stuck to things – it’s easier when dry and not windy.
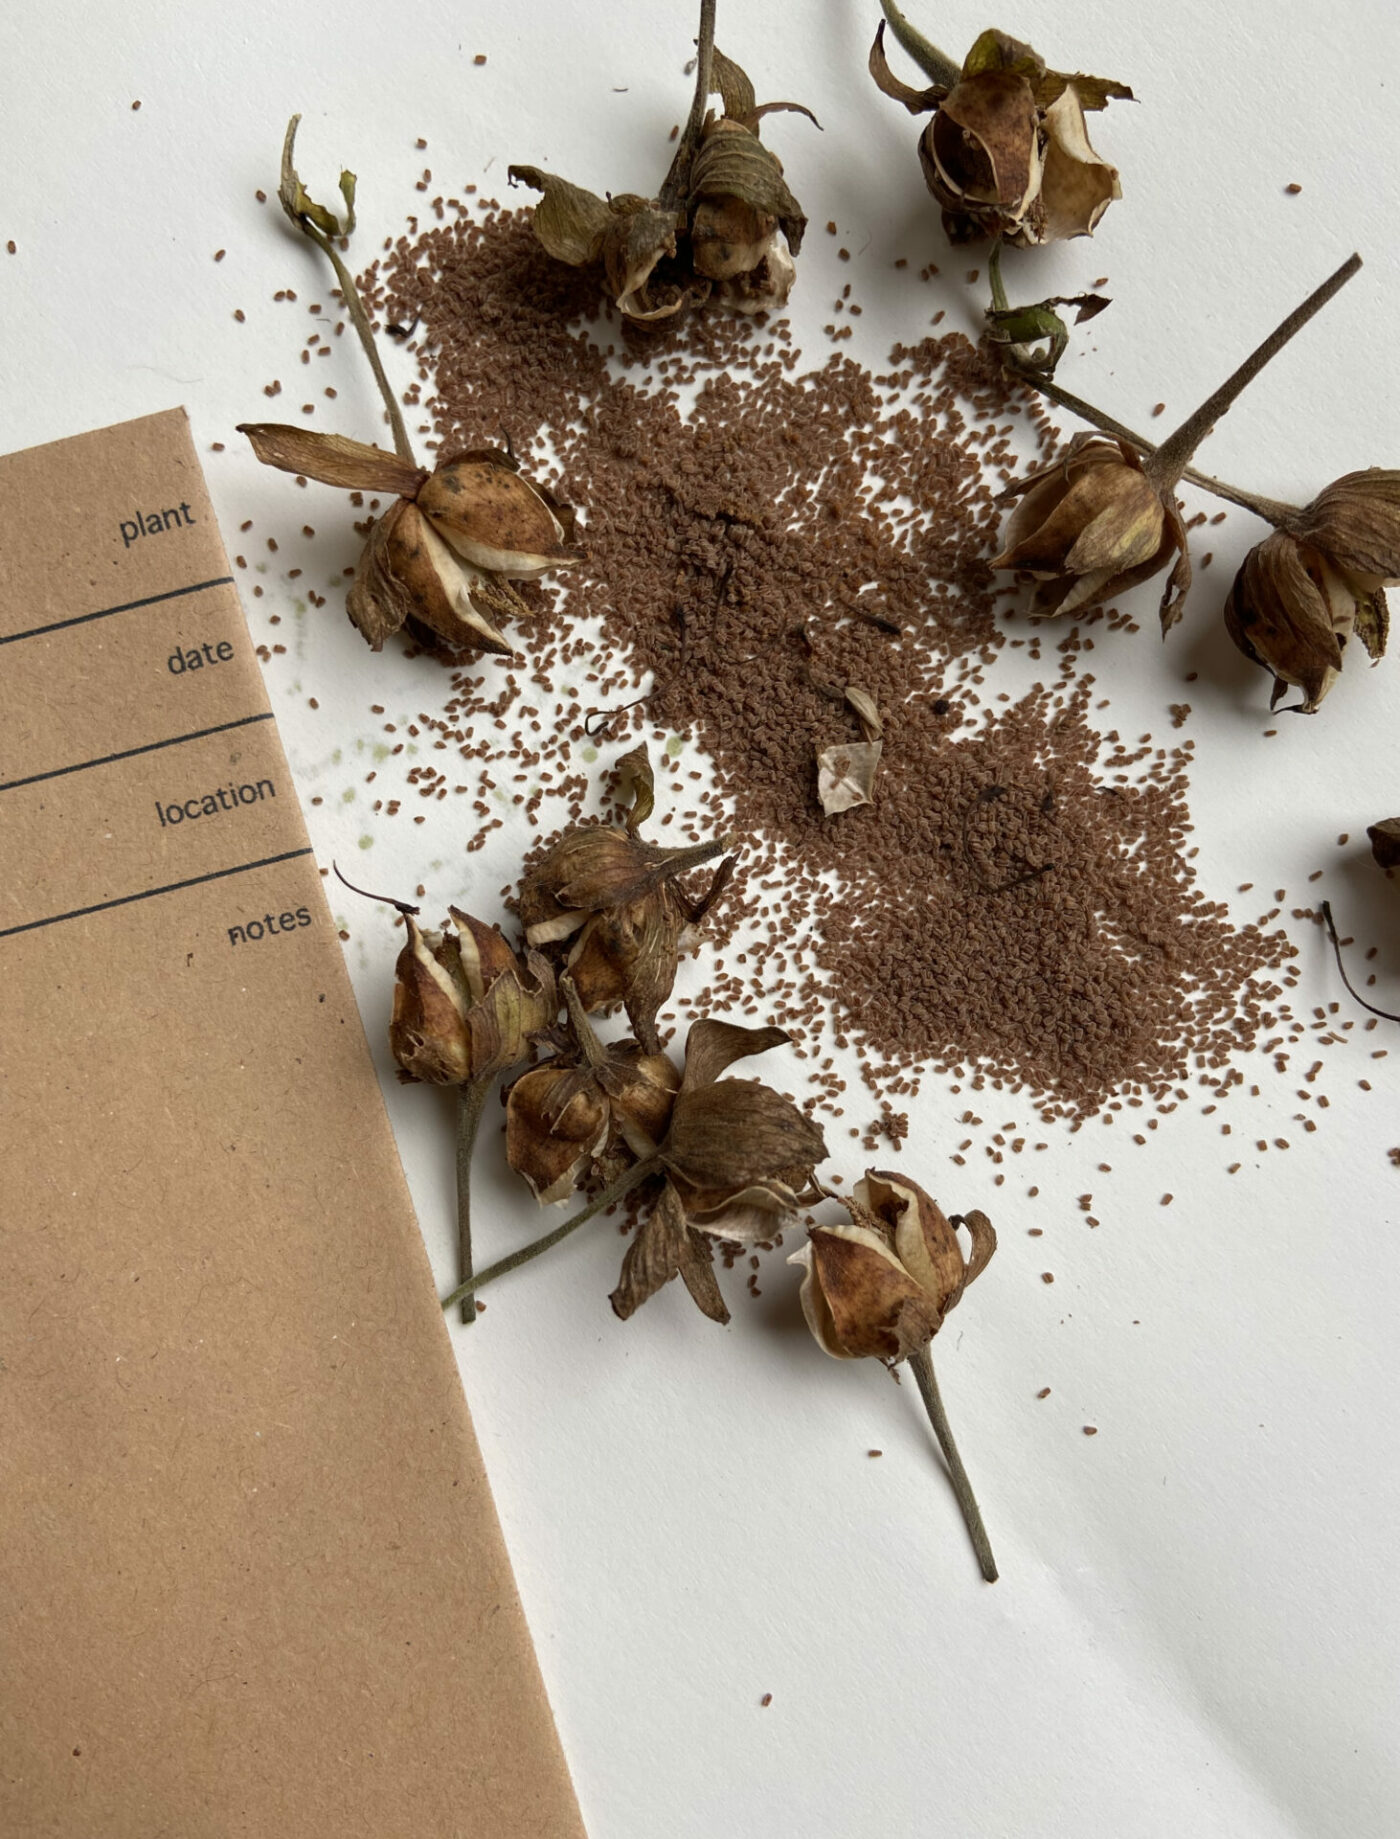
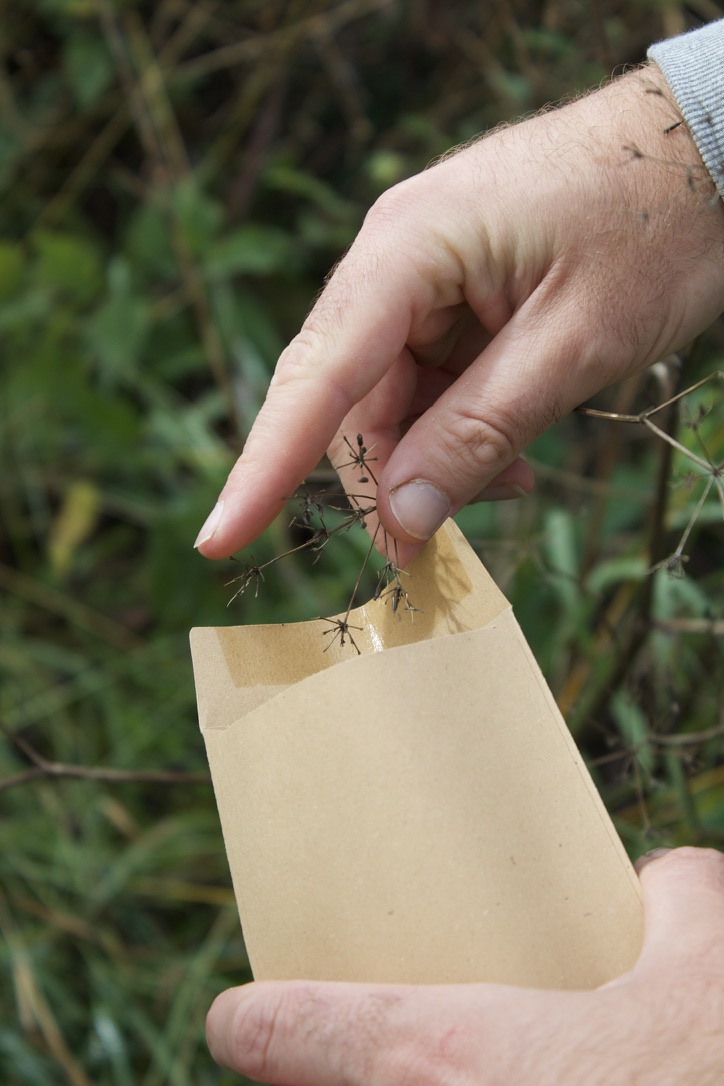
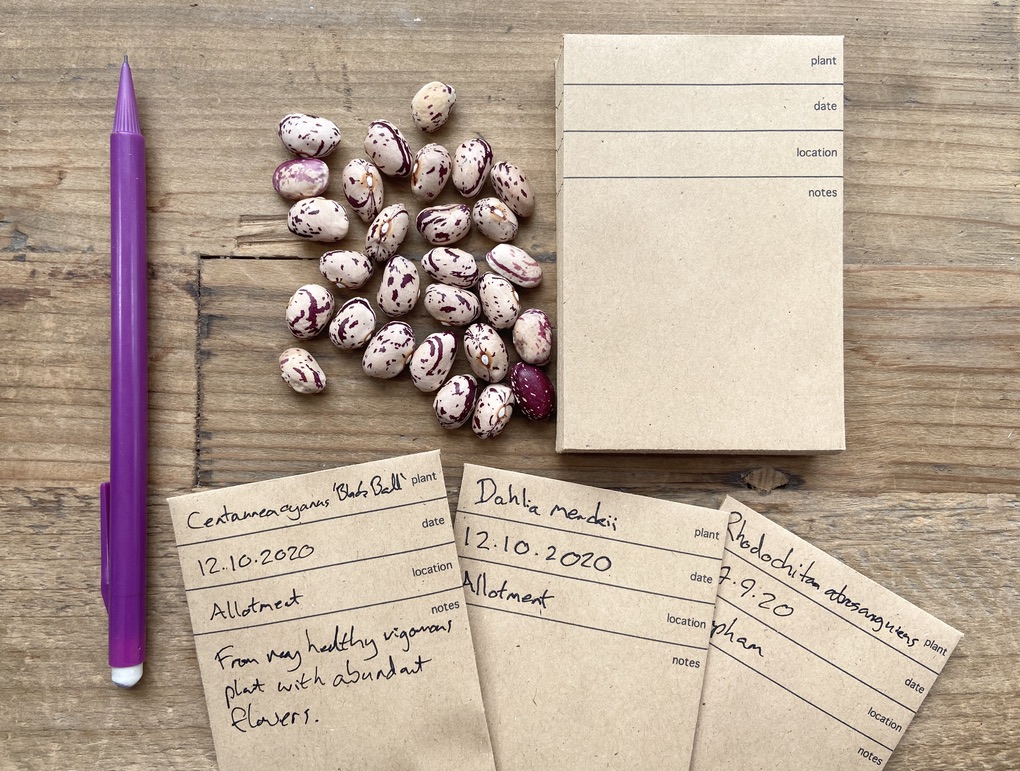
I use paper seed packets, holding them under the seed head and gently tipping, tapping or pinching the seeds to transfer them. I then write the name, date, location and any other notes on the packet immediately because it’s very easy to forget what they are!
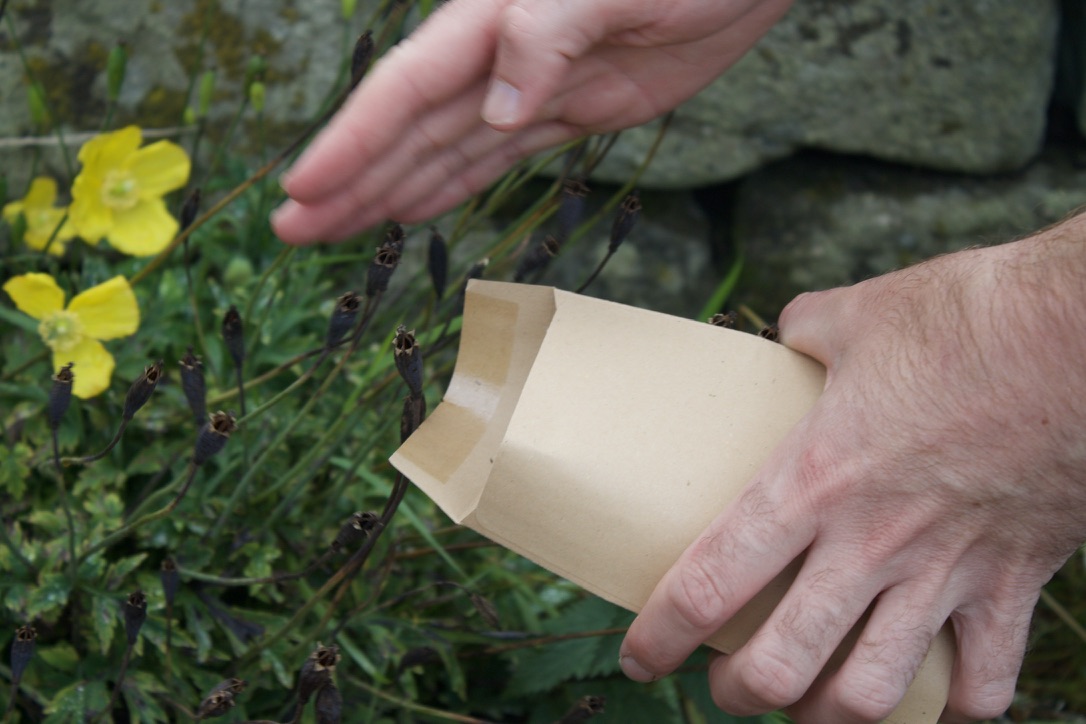
Some seed and seedheads are very delicate, and trying to collect them by hand may cause most of them to fall to the ground. For these, I will put the packet around the whole seed head and cut it off into the packet. Leaving it for a few weeks inside for the seeds to fall of naturally. Then, taking the plant remains away, leaving the seeds in the packet.
For seeds contained within fruits, such as tomatoes, you have to go to a little more effort. The seeds are ready when the fruit is ripe and you need to scrape them out onto a plate, removing as much flesh as possible. Leave them to fully dry next to a sunny window for a week or two, ignore any mould that may grow at this stage, it doesn’t matter. Then scrape the seeds gently into a seed packet as per other seeds.
How to store seeds
First, it’s worth pointing out that many seeds can be sown immediately, removing the need to store them at all. If the plant is dropping the seeds, take a cue from nature and sow them then. Plants you can sow right away include foxgloves, Astrantia, poppies, fennel and many other hardy plants. They may not germinate until next spring, though some will. Less hardy plants, fully tender plants and vegetables are best collected and stored for next spring when you need them.
Always store seeds in paper packets in an air tight container in a dry, dark and cool place, such as a cool cupboard. Seeds are alive and active, but at a very slow rate, waiting for conditions to be right to burst into growth.
They need to be dry to prevent mould and rot, and also to prevent them thinking conditions are wet enough to germinate. The same with light, keep them in the dark to help keep them dormant.
Keeping them in an airtight container and cool (about 5 – 10C) slows down their rate of activity to help prolong their viability – viability meaning they can still germinate and grow. Viability deteriorates over time and varies for every plant species. Some plant seeds are known to be viable for thousands of years, while others, such as many vegetables, will only last in storage for a few years.
For this reason I try to renew most seeds every year unless I know they are particularly good at lasting for many years in storage.