Ferns are very easy to grow from spores and although it takes a number of years, it’s rewarding and you can grow huge numbers of ferns for free! Grow along with me following the below steps.
Basic biology of fern reproduction
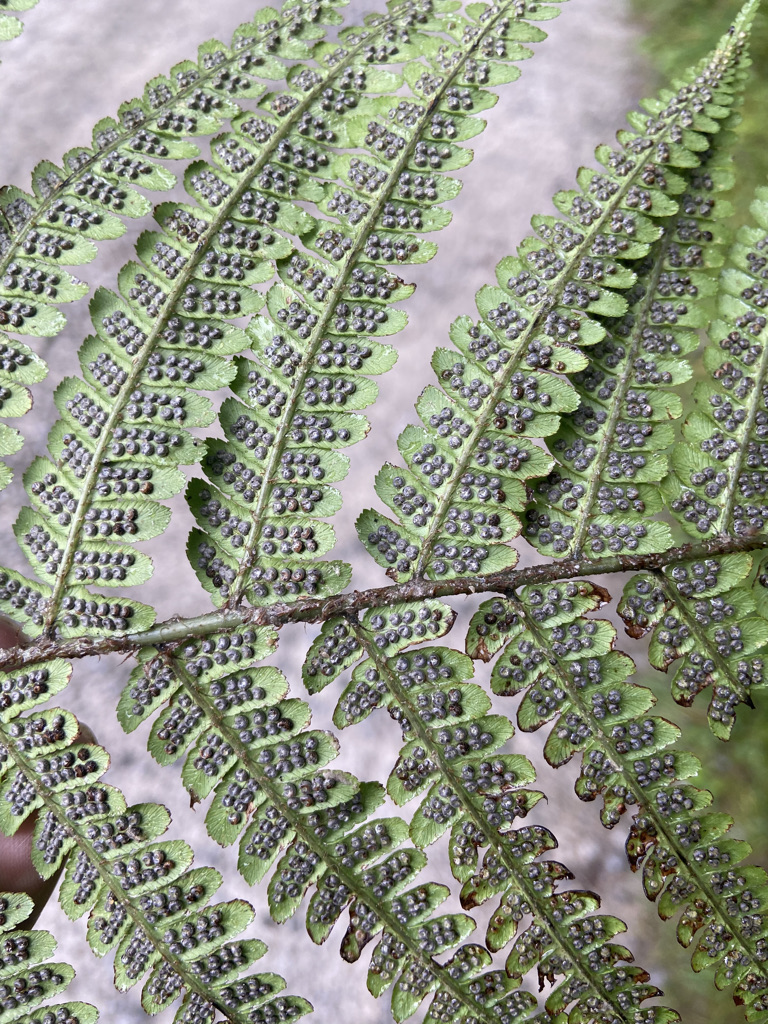
Ferns are among the most ancient of plants and their reproduction is simultaneously less sophisticated than flowering plants that produce seeds, and yet also remarkable in how it works. Spores are produced on the underside of the fern leaf (the frond) in little dots or lines called the sori (plural) or sorus (singular).
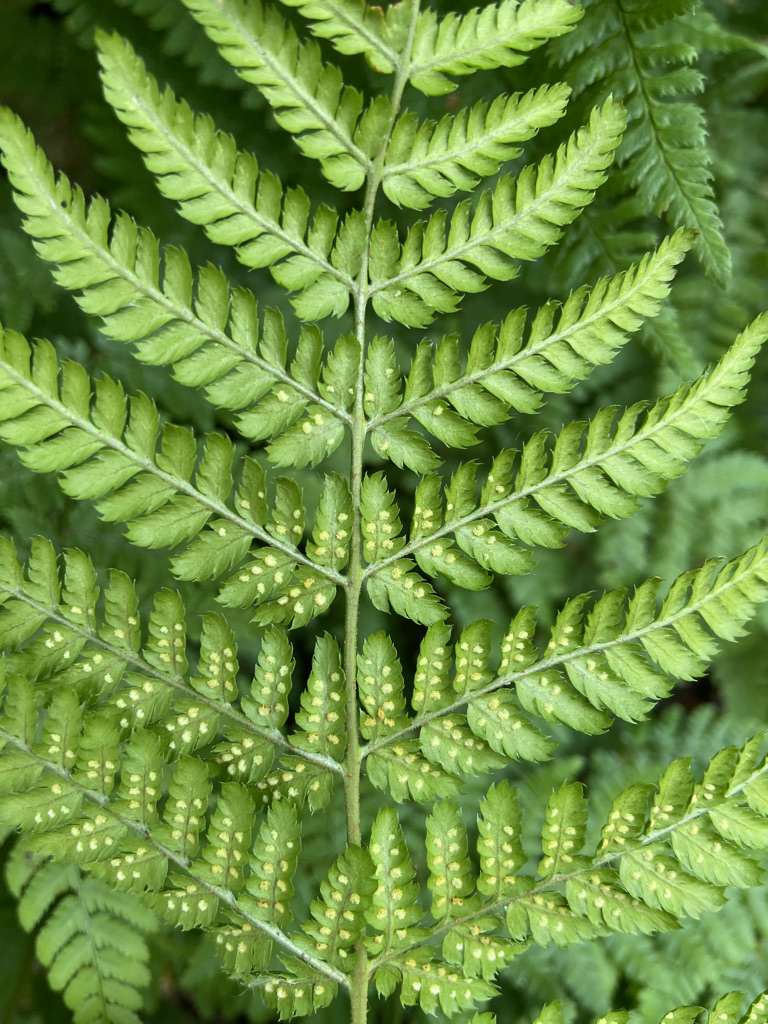
The pattern of the sori under the leaf is one of the best ways of identifying the species of fern. Every fern species has an arrangement, a little like a finger print but the same across each species, so you can match this up in field guide books.
Each sorus contains sporangia which hold the spores. Spores are single cells that are a key part of the fern life cycle which I find incredible because ferns have two forms of plant, a bit like the way a caterpillar undergoes metamorphosis into a butterfly or moth.
A spore will grow into the first stage of a fern called a prothallus (singular) or prothalli (plural) which simply looks like a green scale – it can be mistaken for moss or algae but are distinct because they are solid, like a bit of leaf rooted to soil or rotten wood. A prothallus is the gametophyte stage of a fern’s life cycle, meaning the sexual stage.
This is the point I find remarkable because the prothallus will produce noticeable round craters after a year or so which hold the egg and sperm. Fern sperm swim in water to reach the egg on other prothallus to fertilise them. Yes, fern sperm can swim in water, though it’s more luck in finding the egg for fern sperm than animal sperm.
Once fertilised, the egg and sperm grow into the second phase of the fern’s life which is the non-sexual stage we are more familiar with, the large fully grown fern with leaves that produce spores.
You can see the parallels between later flowering plants that evolved from ferns or their ilk, where the stages of reproduction have morphed into the seed. Interesting too the parallels with animal reproduction.
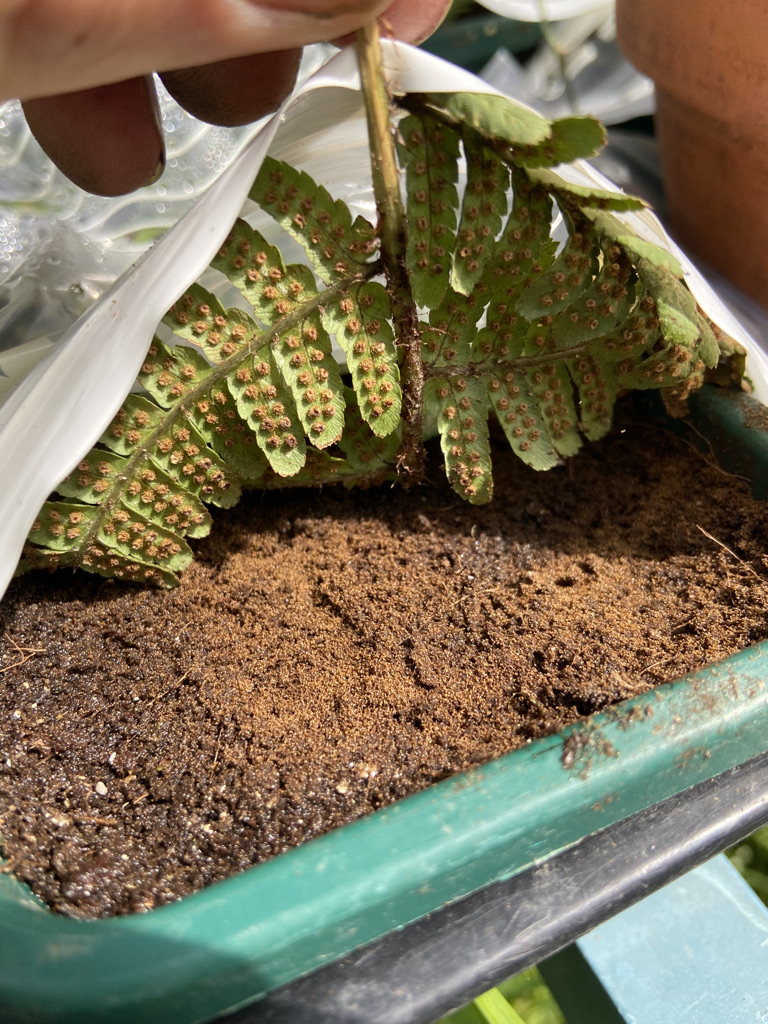
STEP ONE: find some spores
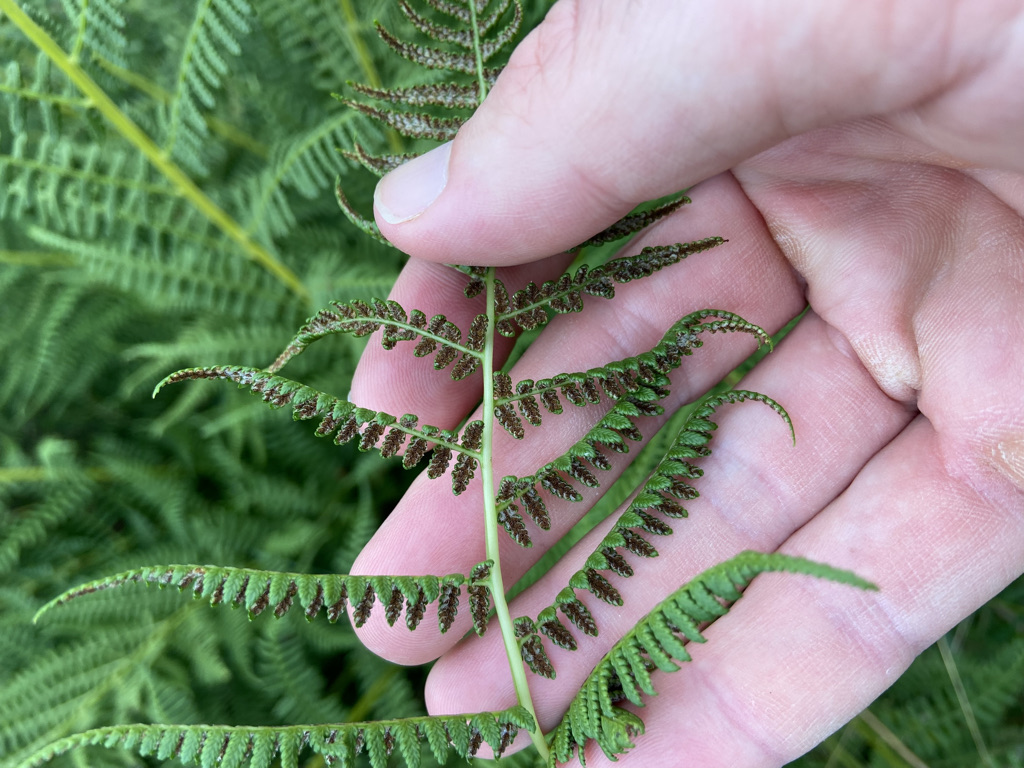
Ferns produce spores at different times of year, though many are ready toward the end of summer. It’s fairly easy to see when they are ready because you should see some brown, yellow or orange dust around the sorus that are dusty. You’ll be able to pinch some of that dust (the spores) with your fingers. If they’re still tight little nodules with no spore dust, they’re not ready.
STEP TWO: sprinkle spores onto damp compost
I use any peat free compost to about 1-2cm deep in little seed trays. You don’t need much compost at this stage. Water from below before adding the spores otherwise you might wash them away. Here I have laid small pieces of leaf, spore side down, over the compost for ease but you don’t need to do this. In fact, if you do, you may have too many spores in the tray, as I do. I did this in late-summer 2021.
STEP THREE: keep covered and place somewhere shady
Keep the trays covered to keep moisture in and to help prevent spores from different ferns floating into your tray. Position somewhere shady out of sunlight and check that they don’t dry out. They shouldn’t do.
STEP FOUR: leave
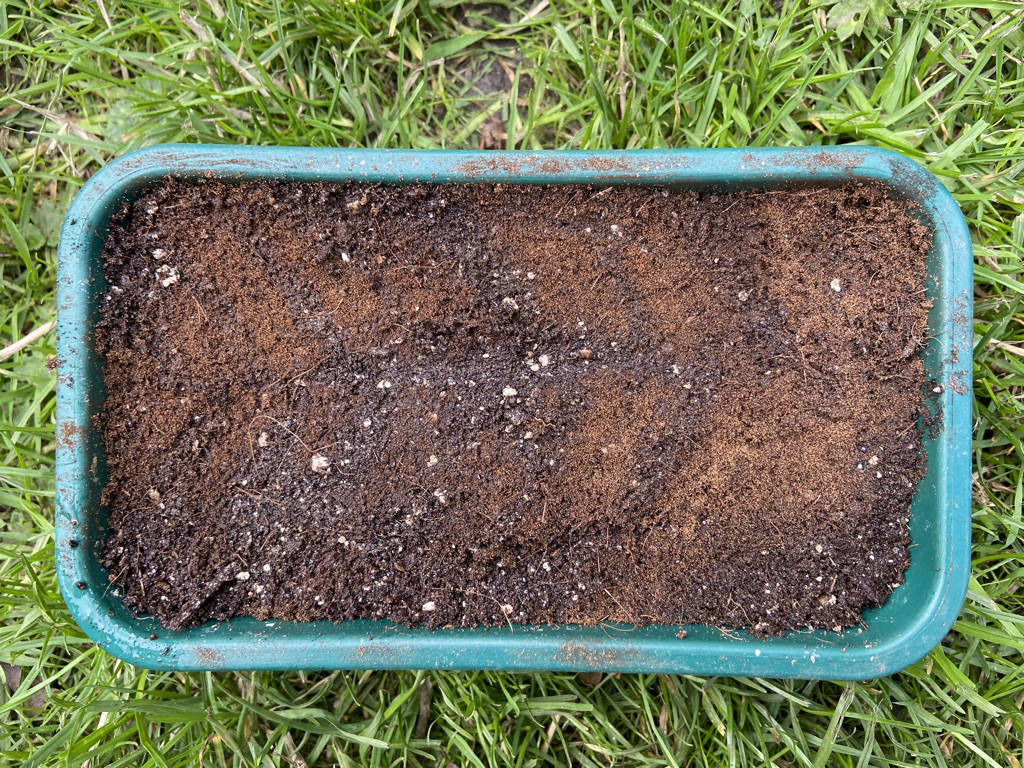
After a few days I could see the spores had fallen onto the compost and I removed the leaves. I then kept them covered, leaving them in the cool shady spot outside for a few weeks. Tender, non-hardy ferns will obviously need to be kept somewhere warm but the process is the same.
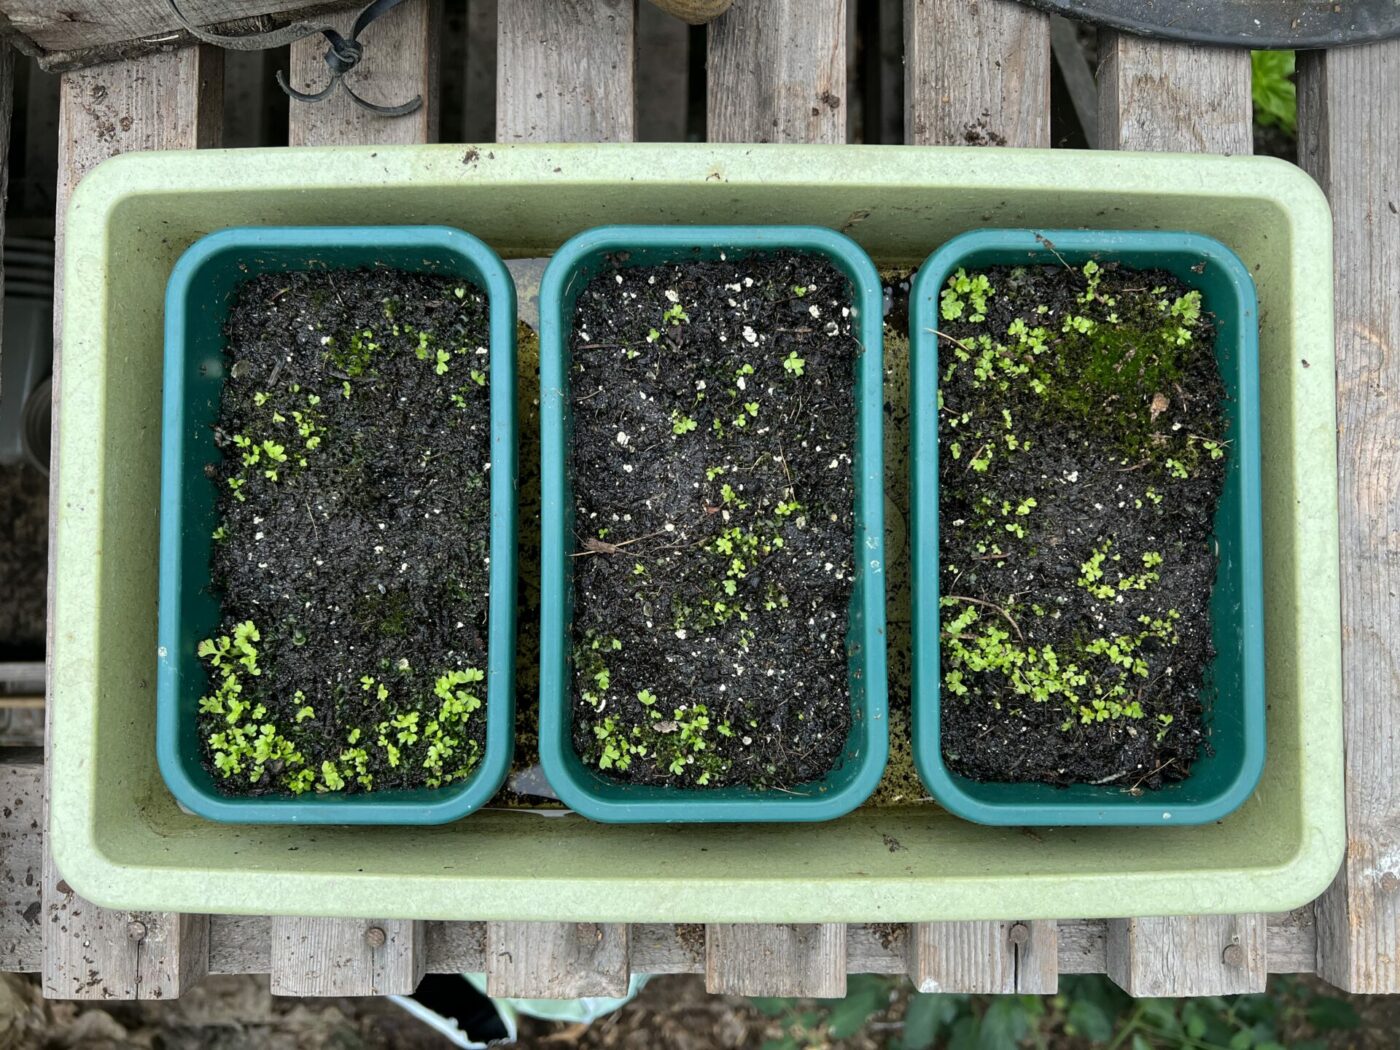
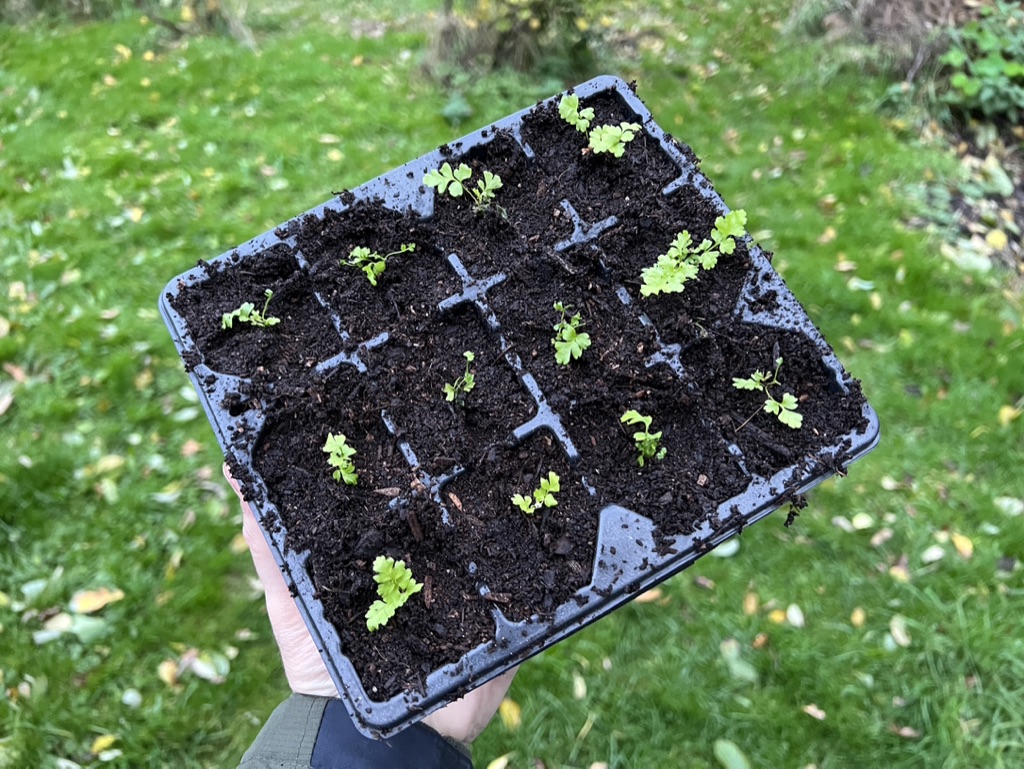
STEP FIVE: signs of life!
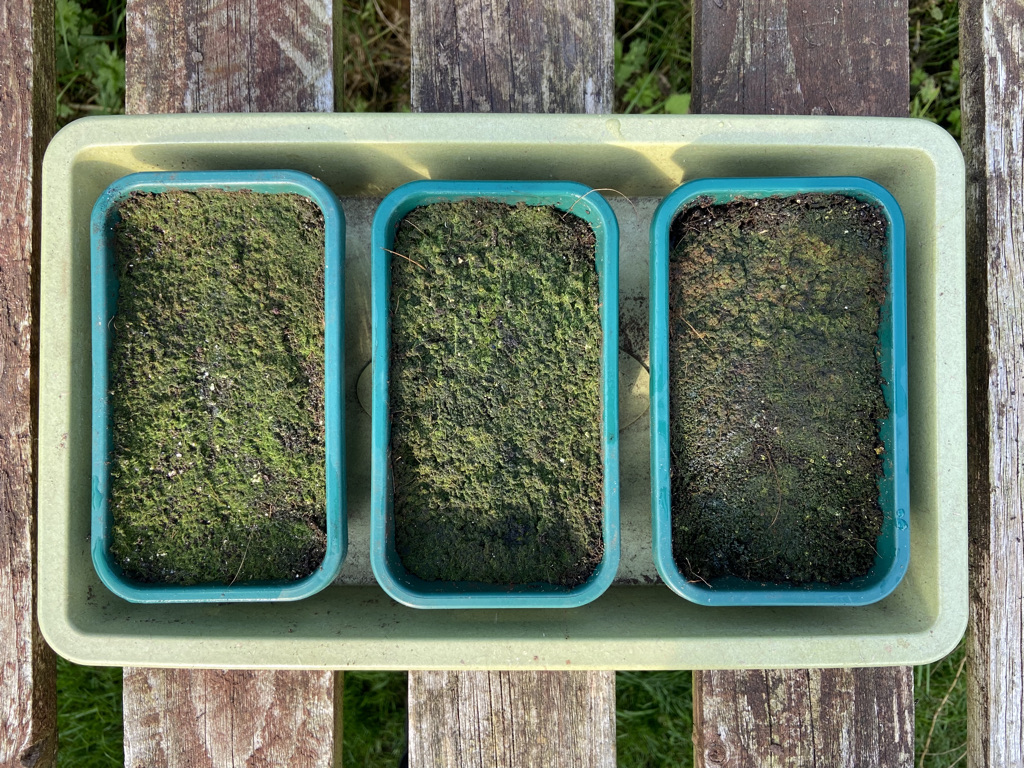
It will take different ferns a different amount of time to reach this stage, but for me, after a few weeks for three different species of fern, a fine green mossy surface has started to emerge. The spores are starting to grow into the prothallus. I will keep these trays covered outside in shade until spring now (I sowed them in late-August / late-summer in the UK).
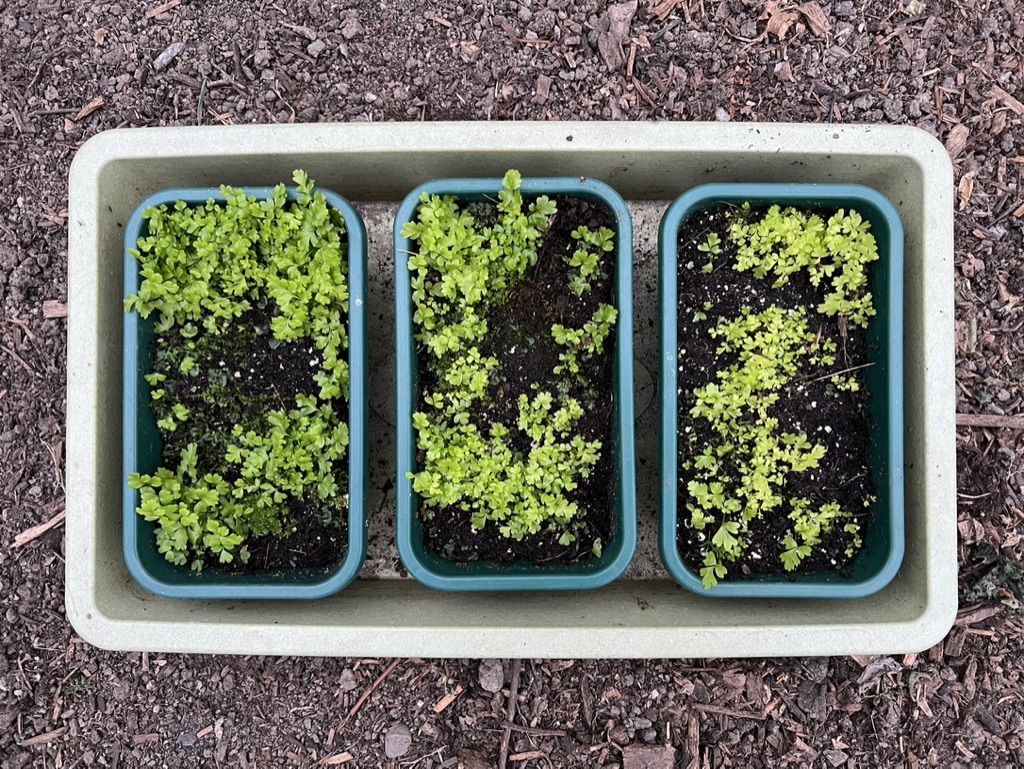
STEP SIX: prothallus
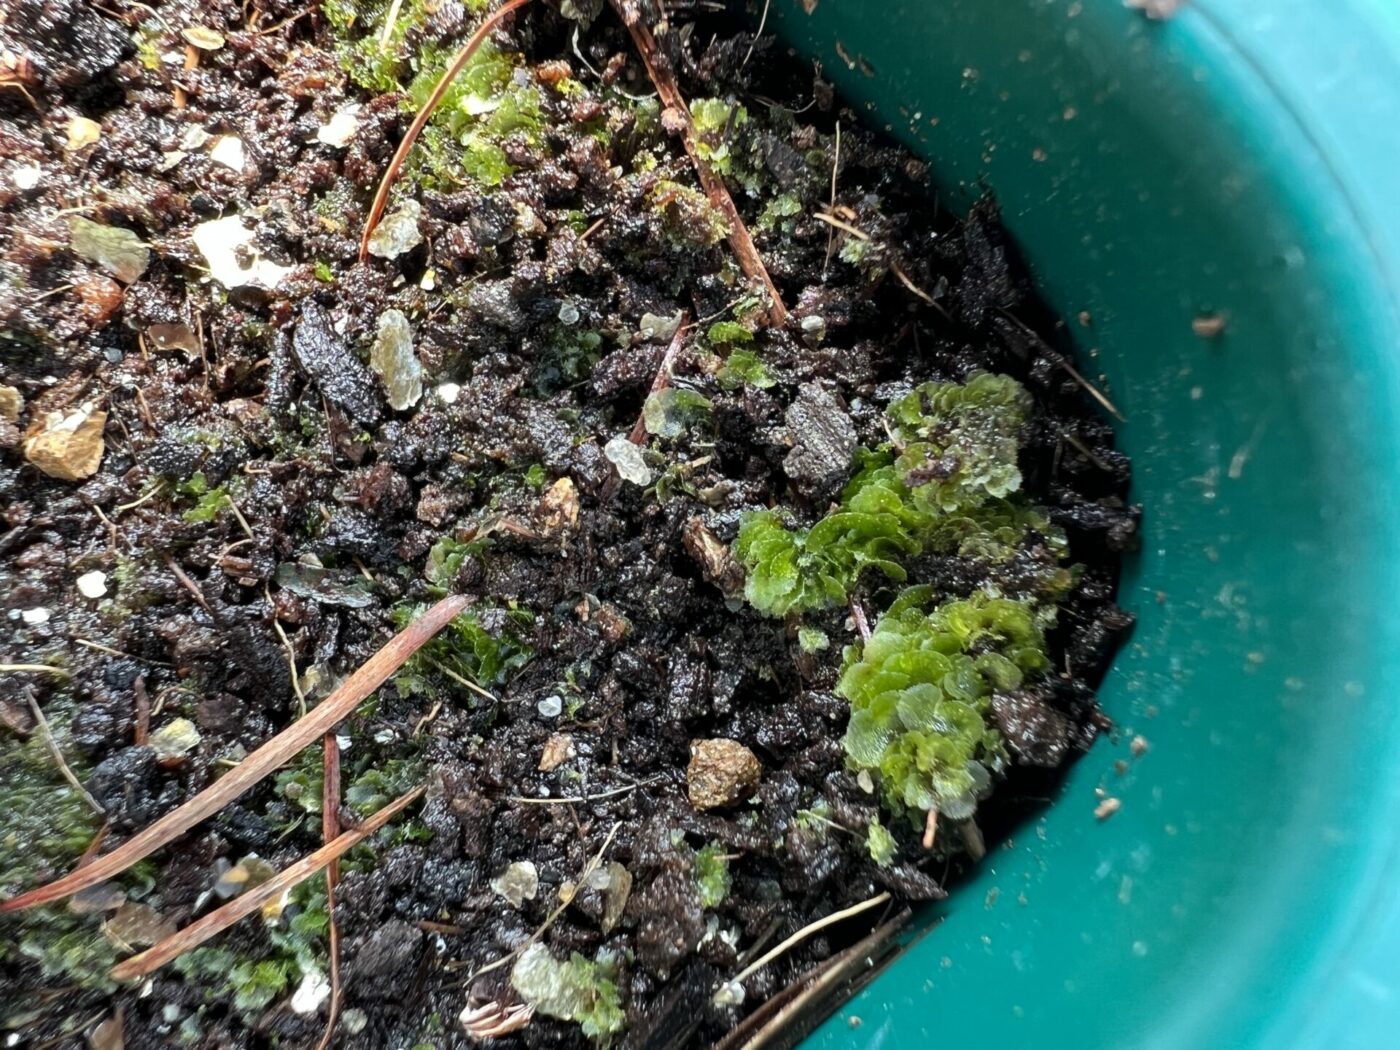
Eventually, the green moss like covering grows to form flat green structures called a prothallus, which is the gametophyte generation of the fern lifecycle. It photosynthesises and has roots as well as male and female sex organs. It cannot produce spores in this generation. The male sex organ produces sperm that swim through water to find female organs on other fern prothallus. When the sperm and female organ meet, a zygote forms, a fertilised plant cell. This grows into the larger sporophyte generation we are familiar with when we think of ferns.
STEP SEVEN: planting into individual pots
Once some of the ferns have fronds about the size of half a thumb, and have perhaps two to three leaves, they should be big and tough enough to dig out and plant up into individual pots of peat free compost.
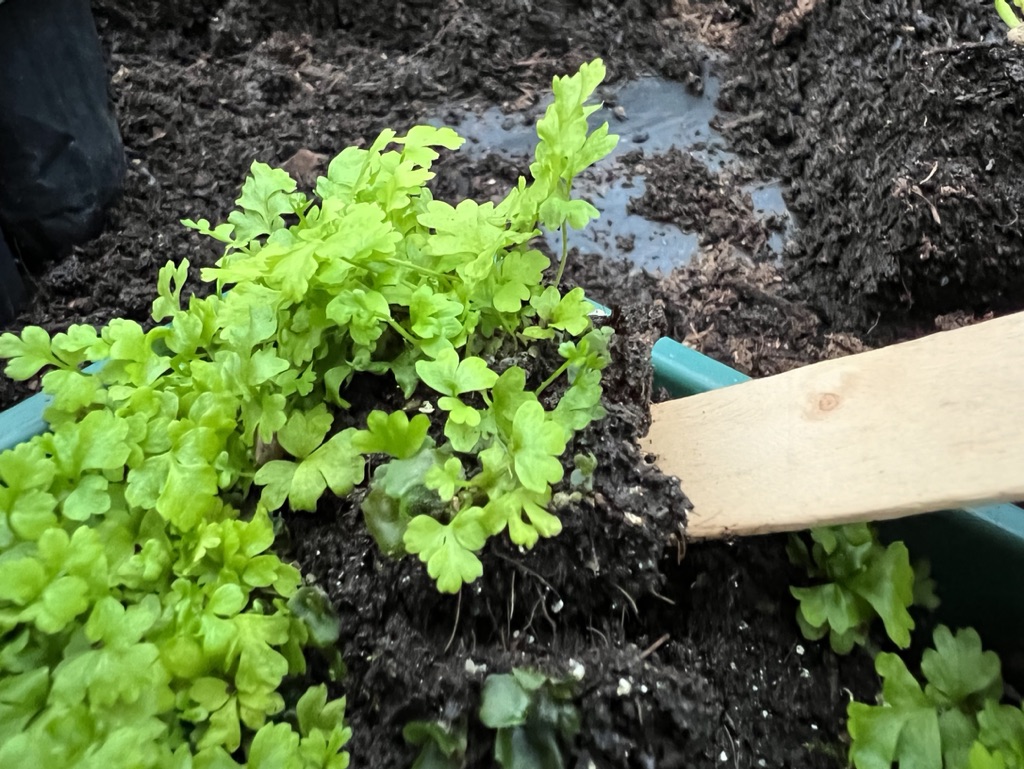
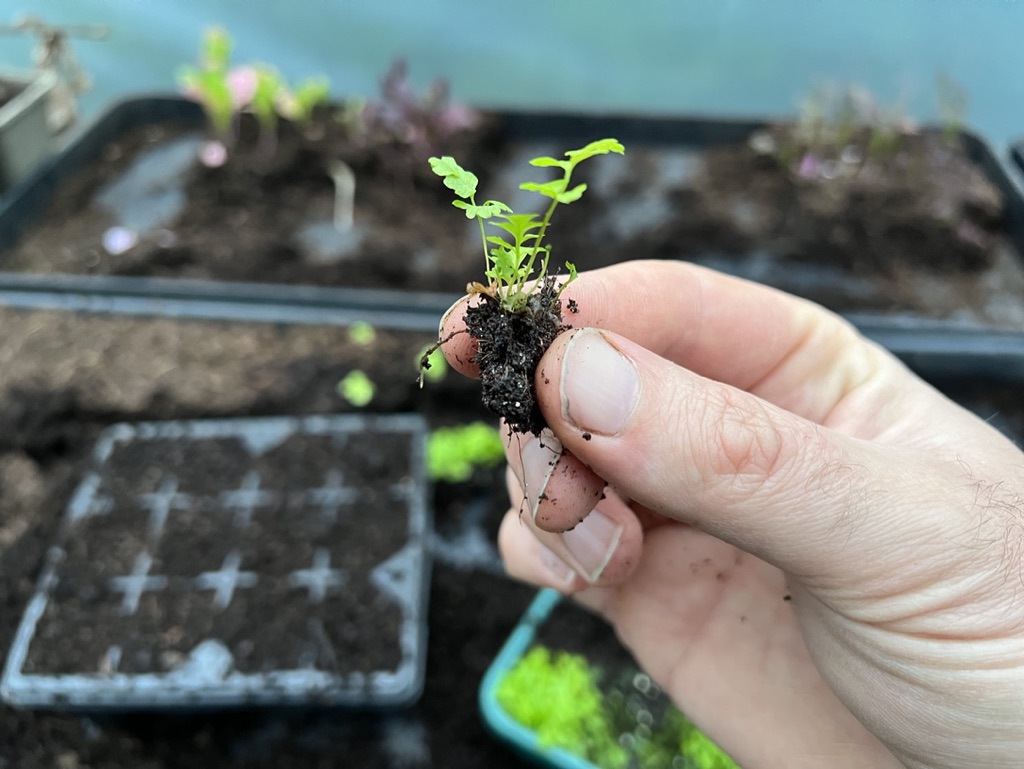
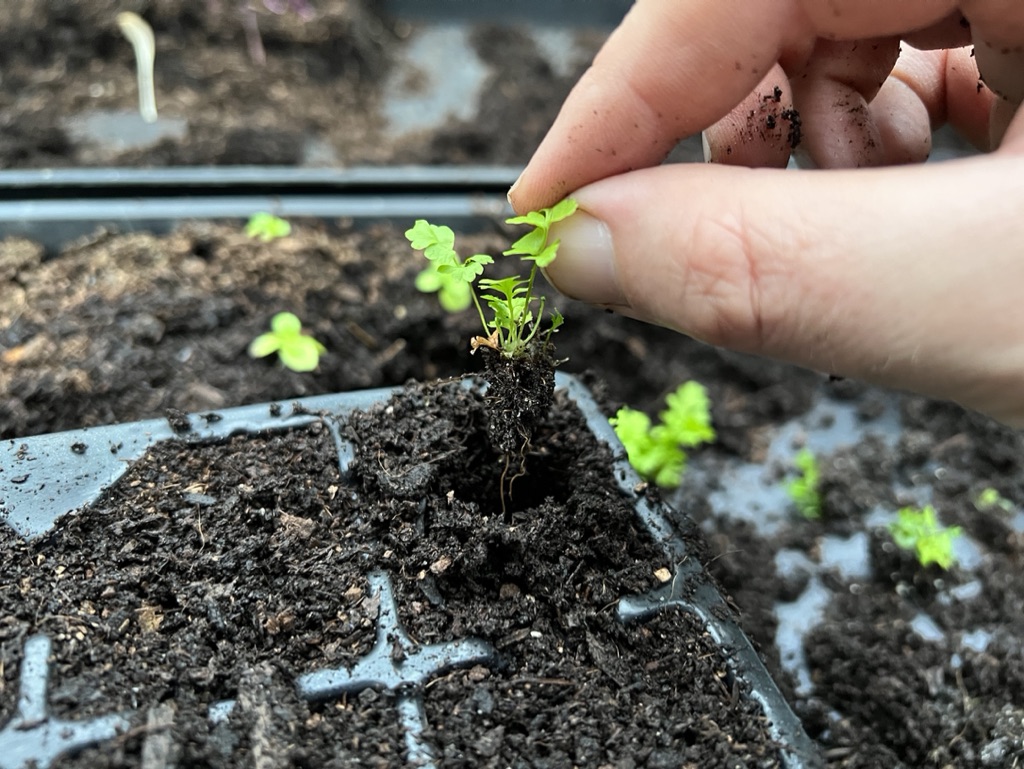
Here I’ve carefully used a bamboo plant label to gently lever out some little fern babies, holding the leaves as much as possible to not damage the fragile roots. I then lower them into little holes made with my finger in prepared pots or seed trays of peat free compost.
Once potted up I give them a good soak of water, which I do by placing in a tray and watering from below, though you could water using a can with a fine rose from above. Place somewhere bright but not in direct sunlight and keep damp for a number of months until they form good sized plants with a number of larger leaves.
STEP EIGHT: planting out
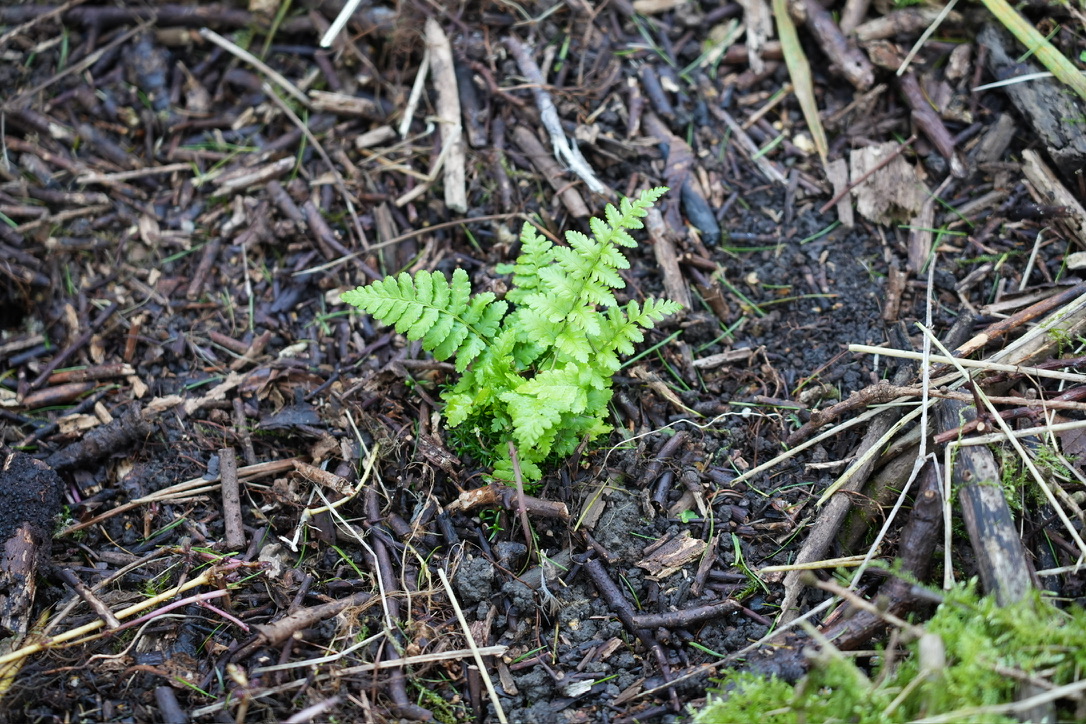
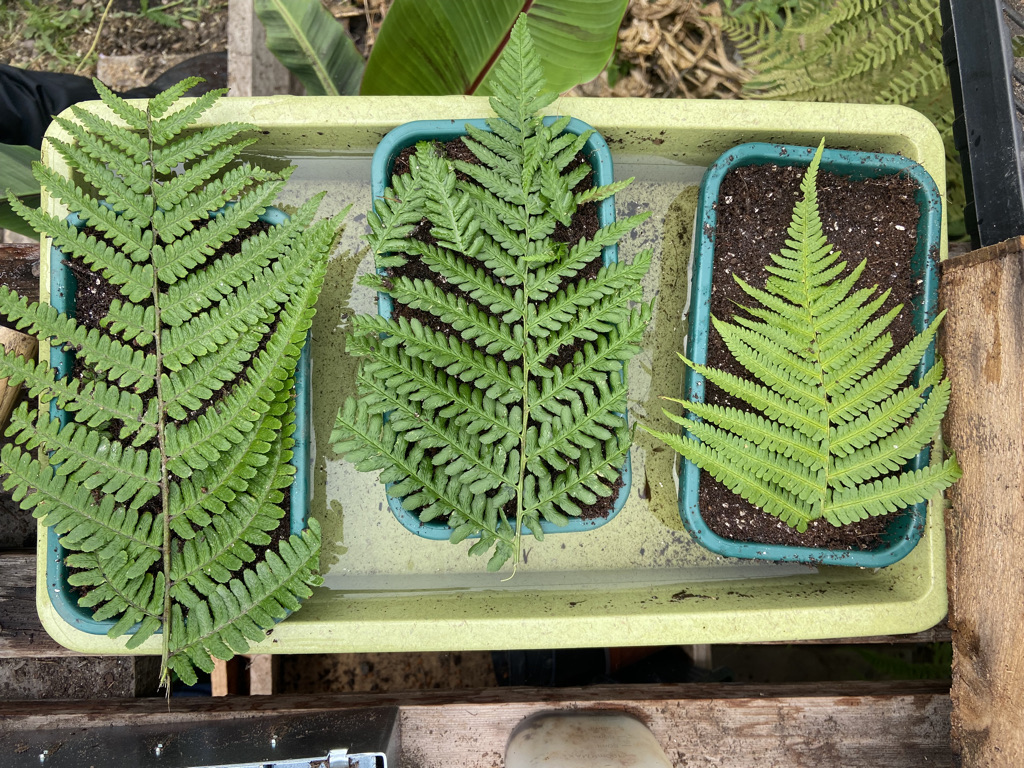
In autumn 2023, two years after I sowed the spores, I planted out the first baby ferns into different parts of our garden. They had a solid crown in the middle of healthy leaves. I’ll report back in future how they are getting on in future years.
Nice article. Clear, encouraging, and helpful. Thanks.
Why do you use peat free compost. An array of articles suggest to use peat moss.
Also do you sterilise your growing medium.
Thank you
Kerrin
Hi Kerrin,
The articles will be old ones recommending bad practice. Peat comes directly from low land peatland habitats, which harms wildlife and also releases the millennia of carbon stored within them. It’s like using fossil fuels.
I’ve used peat free composts for ten years or more now for everything and it’s great, especially for ferns. Peat free compost is basically just composted plant material, which ferns love – it’s essentially what they grow in the wild in woodland where leaf and small branches fall and rot.
Hope that helps!
Jack
Really helpful! I am growing some blue star ferns and I’ve got to the mossy stage but I was finding it hard to identify which stage that was. Your pictures of the different stages really helped! I have a while to go but it’s still fun to see them grow!
Such a great article. Thanks so much!
Wonderful article, thank you, a real gem of a find to help us with a shady garden 😊